


How to Fix Loose Gunpla Joints Without Damaging the Kit
By Hobbyco Editorial Team · · 12 min read
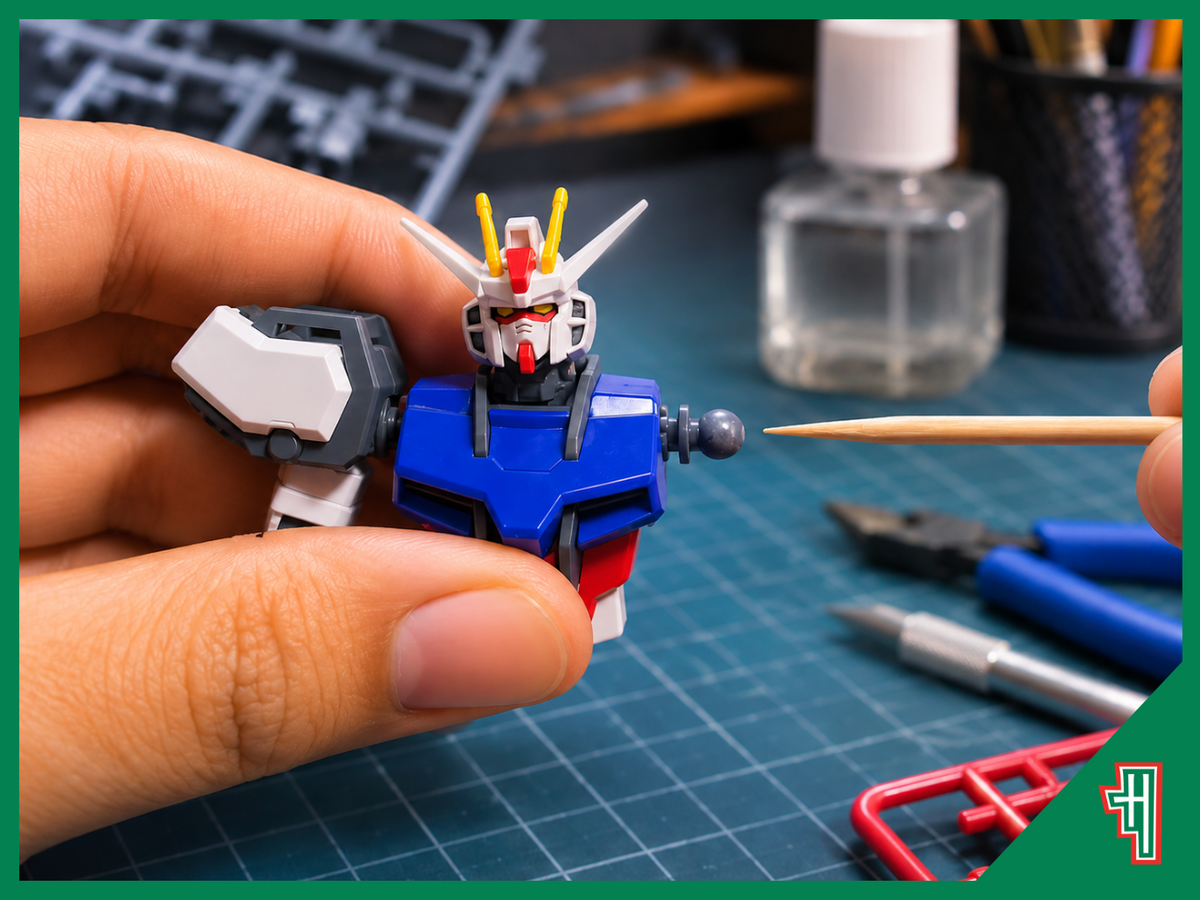
A Gunpla that cannot hold its pose may not need a dramatic repair. Learning how to fix loose Gunpla joints starts with finding the exact moving surface, checking that the parts are assembled correctly and adding only a very small amount of friction when it is genuinely needed. The safest method depends on whether the joint uses a ball, peg, hinge, polycap or more complex internal frame.
TL;DR
-
Confirm the joint is fully assembled, correctly oriented and free from trapped nub material or debris.
-
Identify whether the movement comes from a ball joint, straight peg, hinge, polycap, clip or support connection.
-
Disassemble with the kit instructions and a suitable part separator rather than twisting fragile armour.
-
For a sound but worn ball or peg, apply a very thin compatible coating to the contact surface and let it cure fully before testing.
-
Build thickness gradually. Too much coating can split a socket or scrape paint when the joint is reassembled.
-
Replace a cracked socket, stretched polycap or damaged peg instead of trying to force it tighter.
-
Avoid wet super glue, solvent cement, heat, paper stuffing and unknown nail-polish formulas inside moving joints.
Diagnose the Loose Joint Before Changing It

Pose the model gently and watch where the movement begins. An arm that drops can be loose at the shoulder ball, shoulder-to-torso peg, upper-arm swivel, elbow or connection between armour and frame. A leg may move at the hip, thigh swivel, knee or ankle. Hold the parts on each side of one joint and test only that connection.
Compare the left and right sides when the construction is symmetrical. If one side is firm and the other is loose, inspect the parts for incomplete seating, reversed orientation, a damaged peg, stress whitening or a missing polycap. If both sides behave the same, the movement may be normal for the design or the pose may be placing too much leverage on the joint.
Check the instruction manual before separating anything. Some armour parts hide screws, locking tabs or a sequence that must be reversed. Forcing a part in the wrong direction can break clips that were never meant to flex during disassembly.
Rule Out Assembly Problems
-
Make sure both halves of the joint housing are fully closed without a visible gap.
-
Remove any remaining nub that prevents a peg or ball from seating to its intended depth.
-
Confirm polycaps and internal frame parts face the direction shown in the instructions.
-
Check that an armour panel is not pressing against the joint and creating false movement.
-
Verify that no paint, top coat, sanding dust or panel-lining residue has built up unevenly.
Identify the Joint Type

|
Joint type |
How it moves |
Common reason for looseness |
First check |
|---|---|---|---|
|
Ball and socket |
Rotates and angles in several directions |
Polished contact surface, wear, coating loss or cracked socket |
Inspect the complete ball and socket rim for damage |
|
Straight peg or swivel |
Rotates around one axis or slides into a receiver |
Peg wear, incomplete insertion or stretched hole |
Check peg roundness, depth and alignment |
|
Polycap joint |
Uses a softer internal sleeve or socket |
Stretching, age, chemical exposure or incorrect orientation |
Compare with the manual and inspect for deformation |
|
Hinge or pinned joint |
Bends through a controlled arc |
Worn friction faces, damaged pin or separated housing |
Check the pin, sidewalls and closing pressure |
|
Clip or C-joint |
Snaps around a bar or pivot |
Stress, spreading or repeated removal |
Look for whitening, cracks or loss of spring tension |
Complex Real Grade, Master Grade and Perfect Grade assemblies can combine several joint types. Do not assume the visible ball or peg is the only source of movement. Internal frame sections may shift inside armour, and a loose backpack can make the torso appear weak even when the waist joint is sound.
Use the Least Aggressive Fix First

The basic way to tighten Gundam joints is to increase friction by a very small amount. Start with assembly correction and cleaning. If the undamaged joint is still loose, add a thin, fully cured layer of a compatible product to the ball or peg rather than flooding the socket. A dedicated model-joint product or water-based acrylic clear may be suitable, subject to its instructions and the kit’s material and finish.
Apply the coating with a fine brush away from the assembled model. Keep it off nearby armour, mechanical detail and surfaces that must slide freely. Let it cure for the full product-specified time. The surface must be dry and hard before reassembly. Testing while the coating is soft can bond parts, peel the layer into the socket or create an uneven lump.
Reassemble gently and stop if resistance rises sharply. A thin layer can make a major difference because the clearance is small. If the joint is too tight, separate it and reduce the coating gradually with a method compatible with the material. Do not force the joint through a tight spot.
Why Gradual Thickness Matters
A socket is designed around a particular diameter. Adding too much material can push its walls outward and create a crack, especially in rigid plastic or aged polycaps. One controlled layer followed by a test is safer than several heavy coats applied at once.
How to Fix Ball-and-Socket Joints

Ball joints are common at shoulders, hips, ankles, wrists and necks. Inspect the entire ball for mould damage, flattening or deep scratches. Examine the socket rim and internal cup for a crack. A cracked socket will continue to spread under load, so adding thickness to the ball can make the damage worse.
If both parts are sound, apply the thinnest practical compatible coating to the ball and allow it to cure completely. Keep the layer even around the contact area. Reassemble without twisting against painted armour. Test the range slowly, then leave the model in a neutral pose before trying a heavy weapon or extreme stance.
If the socket uses a replaceable polycap, replacement is often better than repeatedly coating the ball. Check the kit’s spare parts, compatible donor parts or manufacturer support route. The replacement must match the original shape and dimensions rather than simply looking similar.
Loose Shoulders and Hips
Shoulders and hips carry long limbs, so a small amount of play becomes visible at the hand or foot. Remove weapons and accessories while testing. If the unloaded limb holds position but drops with a large rifle or shield, the problem may be leverage rather than wear. A display base or weapon support can reduce the load without making the joint excessively tight.
How to Handle Loose Polycaps

Polycaps are softer sleeves or sockets used in many kits. They can stretch through repeated posing, age or chemical exposure. First confirm the polycap is the correct part and orientation. Similar-looking pieces can have different internal shapes or flange positions.
A lightly worn polycap may regain usable friction when the mating ball or peg receives one thin compatible coating. Avoid saturating the polycap with solvents or strong adhesive. Some chemicals can soften, swell or embrittle materials, and the reaction may not appear immediately.
Replace a split, distorted or severely stretched polycap. Stuffing paper, tissue or loose tape into the socket creates uneven pressure and material that can migrate into the joint. A correctly matched replacement gives more predictable contact and range of motion.
Fix Loose Gunpla Arms Without Over-Tightening

Loose Gunpla arms need a staged check because the shoulder assembly often includes several connections. Remove the weapon, shield and backpack first. Test the wrist, elbow, upper-arm swivel, shoulder ball and torso connection separately. Tightening the wrong point will not stop the arm dropping.
If loose Gunpla arms rotate downward from the shoulder, inspect the ball or shoulder peg and its socket. If the whole shoulder block shifts inside the torso, reopen the chest according to the manual and check the internal mount. If the forearm falls but the upper arm stays still, focus on the elbow or forearm connection.
Do not make a shoulder so stiff that moving the arm twists the torso peg or stresses the chest. Large weapons may still need an action base or support arm.
Check the Pose After the Repair
Return the arm to a balanced pose before testing dynamic angles. Keep heavy equipment close to the body and distribute weight through the torso and legs. Hobbyco’s Gunpla posing guide explains how stance and limb position affect the final display.
Methods to Avoid or Use Only With Expert Knowledge

Wet Cyanoacrylate Inside the Joint
Never assemble a joint while cyanoacrylate is wet. It can permanently bond the parts, wick into hinges and leave frosting on nearby surfaces. Some plastics and painted finishes may also react poorly. If an experienced builder uses it only as a cured surface build-up, the product must be compatible, kept away from the socket and allowed to cure fully before testing.
Plastic Cement on Moving Surfaces
Plastic cement works by softening compatible plastic so parts fuse. That is useful for selected fixed seams, not for a surface that must keep moving. Cement in a joint can weld it solid, deform the contact area or weaken a stressed connection.
Nail Polish and Unknown Household Coatings
Nail-polish formulas vary and may contain solvents or plasticisers not intended for model kits. Colour, gloss and thickness can also transfer to the socket. Use a modelling product with known compatibility instead of an unknown cosmetic coating.
Heat, Flame or Boiling Water
Heating a joint can deform parts, alter fit, damage paint and create burn or fume hazards. It does not provide controlled, repeatable thickening. Do not use a flame, heat gun or boiling water to tighten a joint.
Paper, Tissue or Thick Tape
Loose material can bunch up, tear, trap moisture and create pressure on one side of a socket. Tape adhesive may migrate or leave residue. These shortcuts make it harder to judge the real fit and can stress the housing.
A Repeatable Repair Process

-
Remove weapons, armour or accessories that add weight to the affected limb.
-
Isolate the exact loose connection by testing one joint at a time.
-
Read the kit instructions and photograph the assembly before disassembly.
-
Separate parts with a suitable tool and inspect for cracks, stress or deformation.
-
Correct orientation, seating, nub interference or debris before adding material.
-
If the parts are sound, apply one thin compatible coating to the ball or peg.
-
Let the coating cure fully for the product-specified time.
-
Reassemble gently and stop if the fit becomes sharply resistant.
-
Test the unloaded limb, then add accessories one at a time.
-
Use a display stand or replace the damaged part if friction alone is not enough.
A plastic part separator can open snap-fit sections with less surface damage than a metal blade. Hobbyco’s Gunpla tools range includes part separators and basic building tools. Follow each tool’s safety instructions and never use a hobby knife as a pry bar.
This sequence is the safest general answer to how to fix loose Gunpla joints because it treats repair as diagnosis, not simply adding adhesive. It also makes it easier to reverse a small change before damage spreads to another component.
Know When a Part Needs Replacement

Replace the part when a socket is cracked, a clip is stress-whitened, a peg is bent or a polycap has permanently stretched. Adding more thickness can increase the load on already damaged plastic. Check the kit’s spare runners, official parts support and compatible replacement options.
Repairs that require drilling, pinning, scratch-building or structural adhesive are advanced modifications. They can change articulation and transfer stress to another area. If the kit is valuable, extensively painted or difficult to replace, ask an experienced model builder before making an irreversible alteration.
The Hobbyco Gundam and Gunpla hub provides routes to kits, tools and building resources. Confirm material and product compatibility before using any coating, adhesive or replacement part.
Tighten the Joint, Not the Risk

The key to how to fix loose Gunpla joints is restraint. Find the correct connection, correct assembly issues first and add only enough cured material to restore useful friction. Replace cracked or deformed parts instead of forcing them to hold.
When you tighten Gundam joints gradually, the model should keep its intended articulation without transferring excessive stress to the socket. For loose Gunpla arms carrying large weapons, a balanced pose or display stand may be safer than an extremely tight shoulder.
Frequently Asked Questions
What is the safest way to tighten a loose Gunpla ball joint?
Inspect the ball and socket for cracks, clean the contact surface and apply one very thin layer of a compatible model product to the ball. Let it cure completely before reassembly. Test gently and stop if resistance becomes excessive. Replace a cracked socket rather than making the ball thicker.
Can I use super glue to tighten Gundam joints?
Wet super glue can permanently lock the joint, wick into nearby parts and frost the finish. It is not the safest beginner method. Use a compatible dedicated product or controlled water-based coating instead. If cyanoacrylate is used by an experienced builder, it must cure fully before the parts touch.
Why are my Gunpla arms loose after painting?
Paint may have worn away unevenly, prevented complete assembly or left debris inside the joint. Disassemble according to the manual and identify the actual contact surfaces. Use only a repair product compatible with the paint system, and avoid spraying the assembled joint.
Should I coat the socket or the ball joint?
Coating the removable ball or peg usually gives better control and keeps material away from internal detail, but the joint design can differ. Apply only to the true contact area and let it cure before testing. Never flood a socket with liquid.
How do I fix loose Gunpla joints that are cracked?
Stop posing the joint and replace the damaged socket, clip, peg or polycap where possible. Adding thickness can spread the crack. Structural repairs involving drilling, pins or permanent adhesive are advanced work and may be better handled by an experienced builder.
You may also like

What Is Gundam Assemble? A Beginner’s Guide
Gundam Assemble combines model building, miniature painting and competitive tabletop play in one Gundam experience. Players assemble approximately 5 cm miniatures representing Mobile Suits and other units from across the Gundam series. These miniatures then form squads that battle across a game...
Gunpla Nub Mark Removal: Clean Cuts Without Stress Marks
A clean build begins before a part leaves the runner. The force, angle and order of each cut determine whether the gate becomes a tiny raised nub, a shallow gouge or a pale stress mark that reaches below the surface. Good Gunpla...

Gunpla Top Coat Guide: Matte vs Gloss vs Semi-Gloss
This Gunpla top coat guide compares matte, gloss and semi-gloss finishes, then explains how compatibility, surface preparation and spray technique affect the result. The best finish is the one that supports the build's materials, decals and intended look rather than whichever can...
Comments